
Motivation
Recently I watched a video (https://www.youtube.com/watch?v=h_MHgkZKJGU) about the incredible Thomas Dambo building another giant troll in the forest near Rouen, France and I noticed that his troll is wearing a birdhouse around its neck. He explained that, when he was a rapper, he made necklaces with a little birdhouse for himself. “Great idea” I thought, I’ll pinch that and add some movement to make it my own. It is also coming up to birthday time for one of my friends so it will make a good present too!
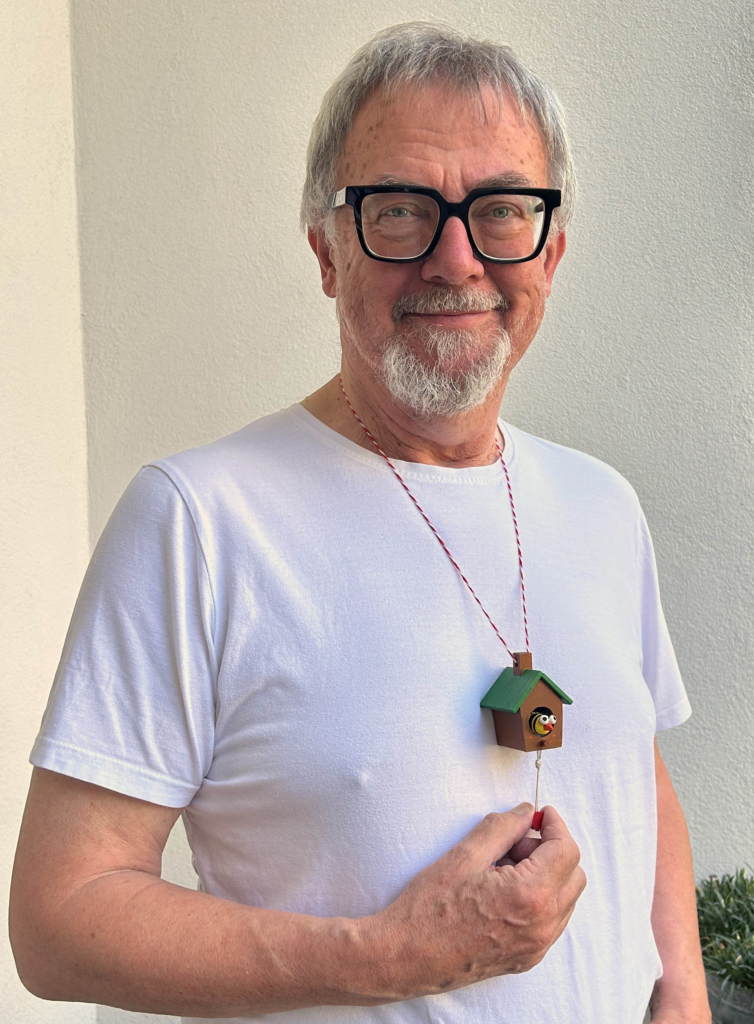
A wearable automaton – who could ask for more?
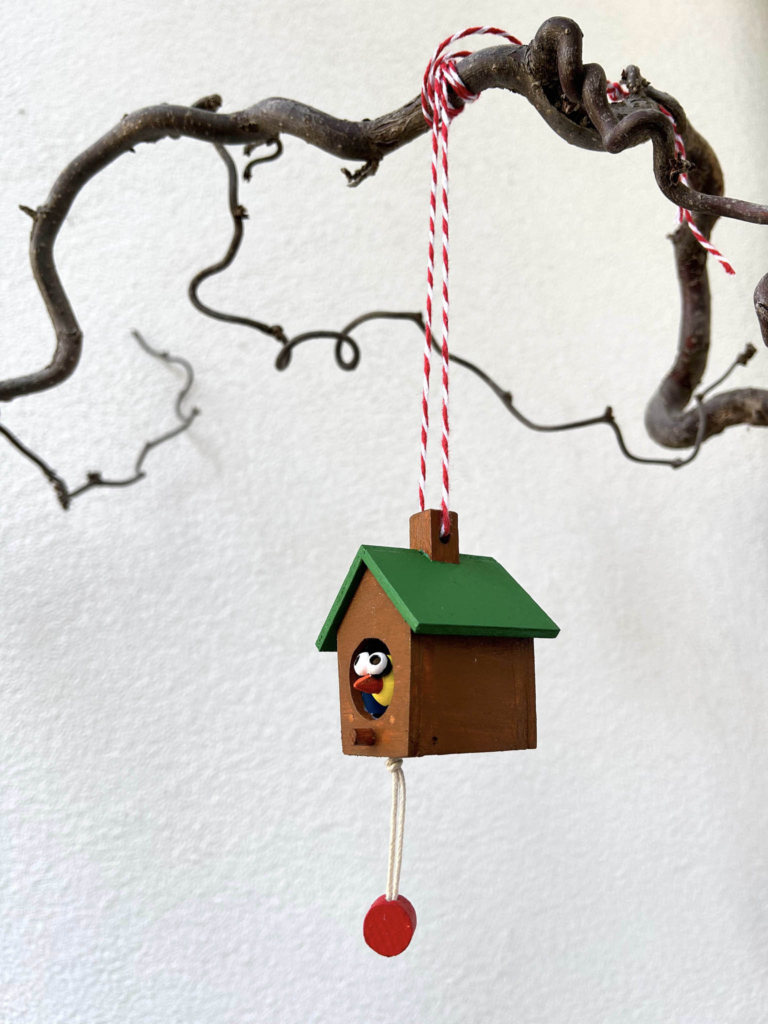
An automaton hanging from a branch
What’s the Story?
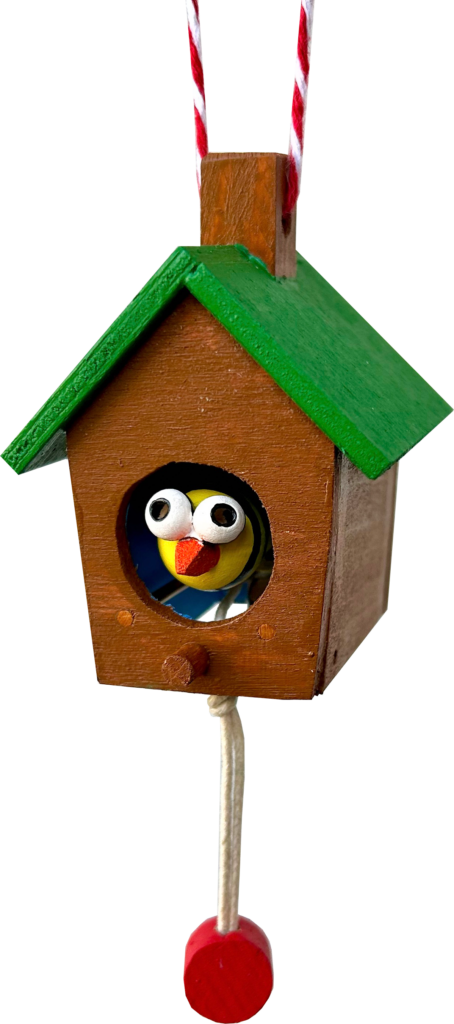
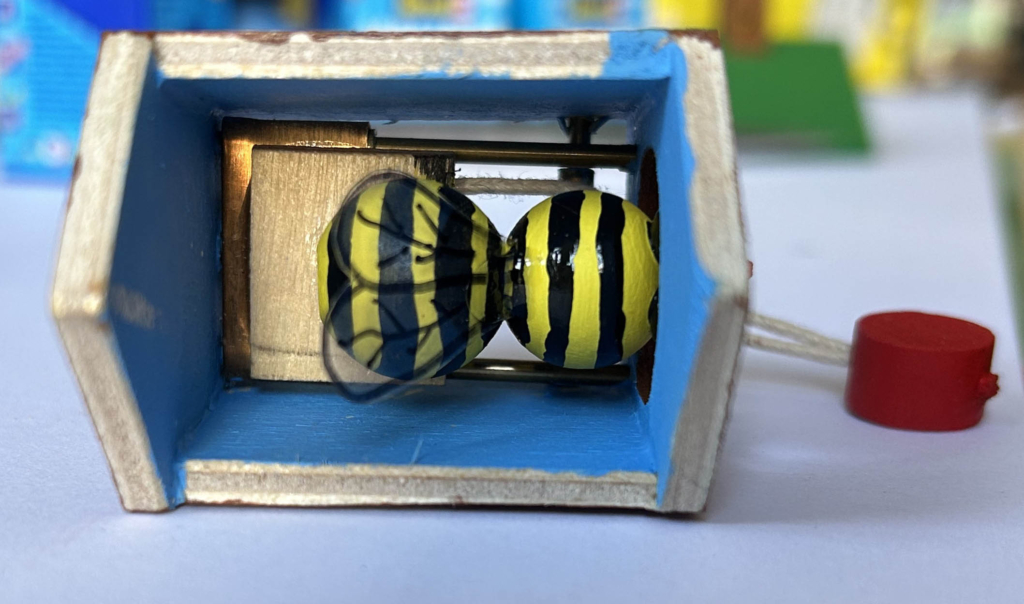
Just making something move isn’t that interesting, a story is required, even if it’s just a teensy weentsy one. You can see what looks like a cuckoo clock’s pendulum hanging at the bottom. Giving this a tug makes the occupant of my little house stick its beak out of the door. But is it really a beak? When the figure comes out, black and yellow stripes reveal it to be some sort of bee. First impressions can be deceptive.
So now I have a story – it’s a funny bee that is convinced that it is really a bird, a cuckoo. It has made itself at home in something reminiscent of a Bavarian cuckoo clock and, when the pendulum is pulled at the right time, it does its duty, pops out and, instead of “cuckoo” it goes “buzzz-buzz”.
Making
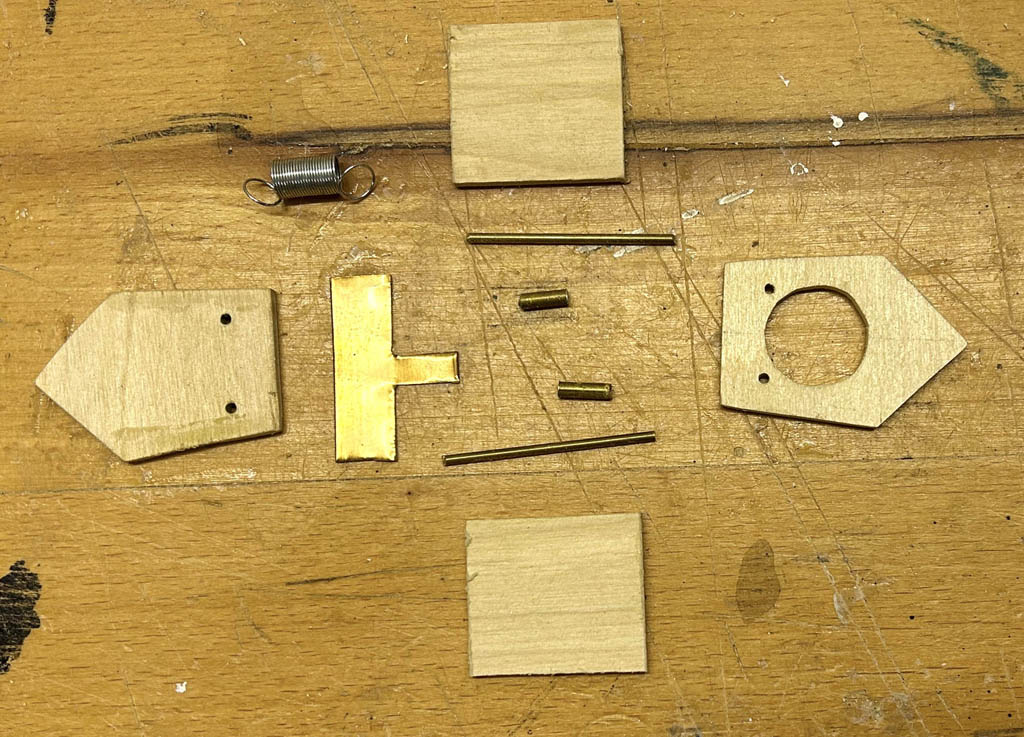
The house is made of 3 mm plywood, and stands 54 mm tall (not counting the chimney). To allow the movement forwards and backwards I used two brass rods along which two small pieces of brass tubing slide very easily. Some thin brass foil cuts easily to form a carriage which links the two tubes and holds one end of a spring.

The tab folded up 90° at the end of the carriage holds one end of the spring and soldering it in place makes sure that it stays put.
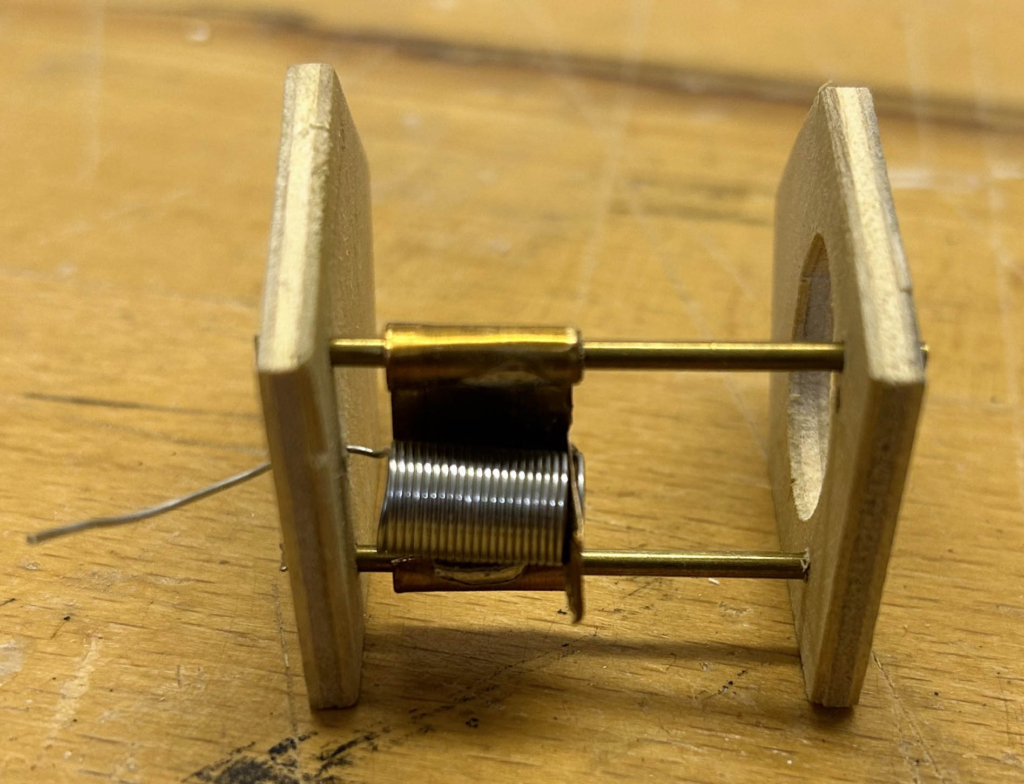
The “loose” end of the spring passes through a hole in the rear wall where it is glued (2-component epoxy resin) in place.
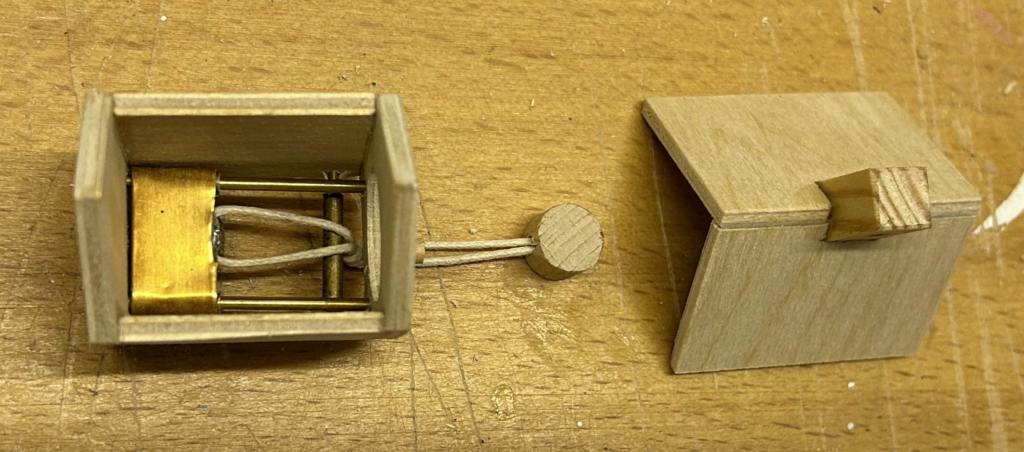
To convert a downward pull into a forward movement a roller is handy. This is again made up of a solid brass rod with a loosely fitting tube slid onto it. I suppose that you could just use a plain rod, without a tube, but there would be more friction.
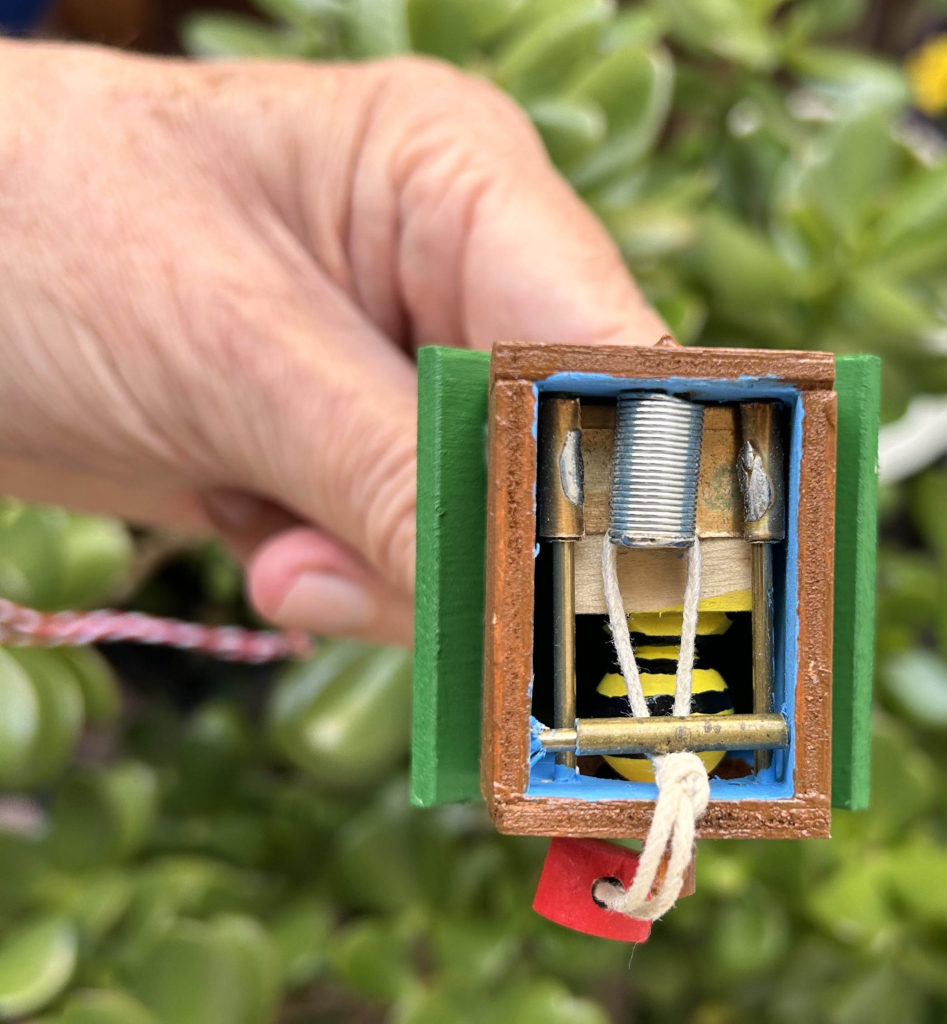
Note that the roof has a chimney in the middle. This is not just to keep things cosy inside, it also serves as a good place to thread a coloured cord through, to use as a necklace.

The bee has to be fully painted before it is glued into the confines of its house. The wings are scarcely visible once installed, but what is a bee without any wings?
Soldering
Soldering is not hard. You need an electrically powered soldering iron and some solder. The very small parts concerned here don’t take long to heat up and to melt the solder until it flows along the surface. There is something called flux in solder which assists the soldering process. As the solder melts it produces quite acrid fumes which are best avoided or blown away from your nose/eyes. Things get hot of course, so try not to burn your fingers! Alternatively you could try glue, but make sure that it doesn’t get in the wrong places and gum up the movement.
Reflections
This is a relatively simple and quite small project and the motion is also fairly straightforward. If the viewer doesn’t immediately understand the story, some showmanship is helpful. Making the pull-cord swing to and fro while calling out “tick tock” reinforces the impression of a clock. When pulling the cord to make the bee reveal itself, a suitable musical “buzzzz buzz, buzzzz buzz” shows how the bee is doing its best to play the part of a cuckoo.
Video
URL https://youtu.be/fBPiTorWxkU
Download
Download the image files here – https://www.wordwise.de/Beehouse-archive.zip